Saturday, November 12, 2011

New Neighbor

The empty lot that's next to mine has been sold! Lucky for me, the buyer is also using Elemental Design as their architectural firm. Here's what the neighbor's house will look like:


It looks like it will compliment my structure quite well. I'm excited to see it get built!

And a mini-update: the structural plans are finally in, and we're in the process of getting a lumber and steel package together. Framing will start as soon as the numbers for the materials and labor come back. 

Monday, October 24, 2011

Foundation Completed

At this point, the foundation work is completed! Some dirt-moving still remains, but all of it is minor. The driveway is put back together:


Here you can see the final walls that were poured:


Now there is a solid wall on the front of the house. You can see the notched-out area for the garage entry:


This is a square of concrete that was poured for the support beam for the cantilevered portion of the house.


And finally, here you can see the sea of concrete that was poured to get the foundation to completion.


It looks much more impressive in person. That photo was taken from the northwest corner of the lot. The wall in the back is 9' high. You can also see the three driveway retaining walls on the upper left side and far right side of the picture. The floor pictured here is a bit dirty, but once the framing is up, it will be cleaned, sealed, and should look great. 

At this point, it's ready for framing! There is a bit of a delay in getting final framing plans to the sub-contractors, but I'm hoping work can start within a week or two.

Saturday, October 15, 2011

Backfill and Utilities

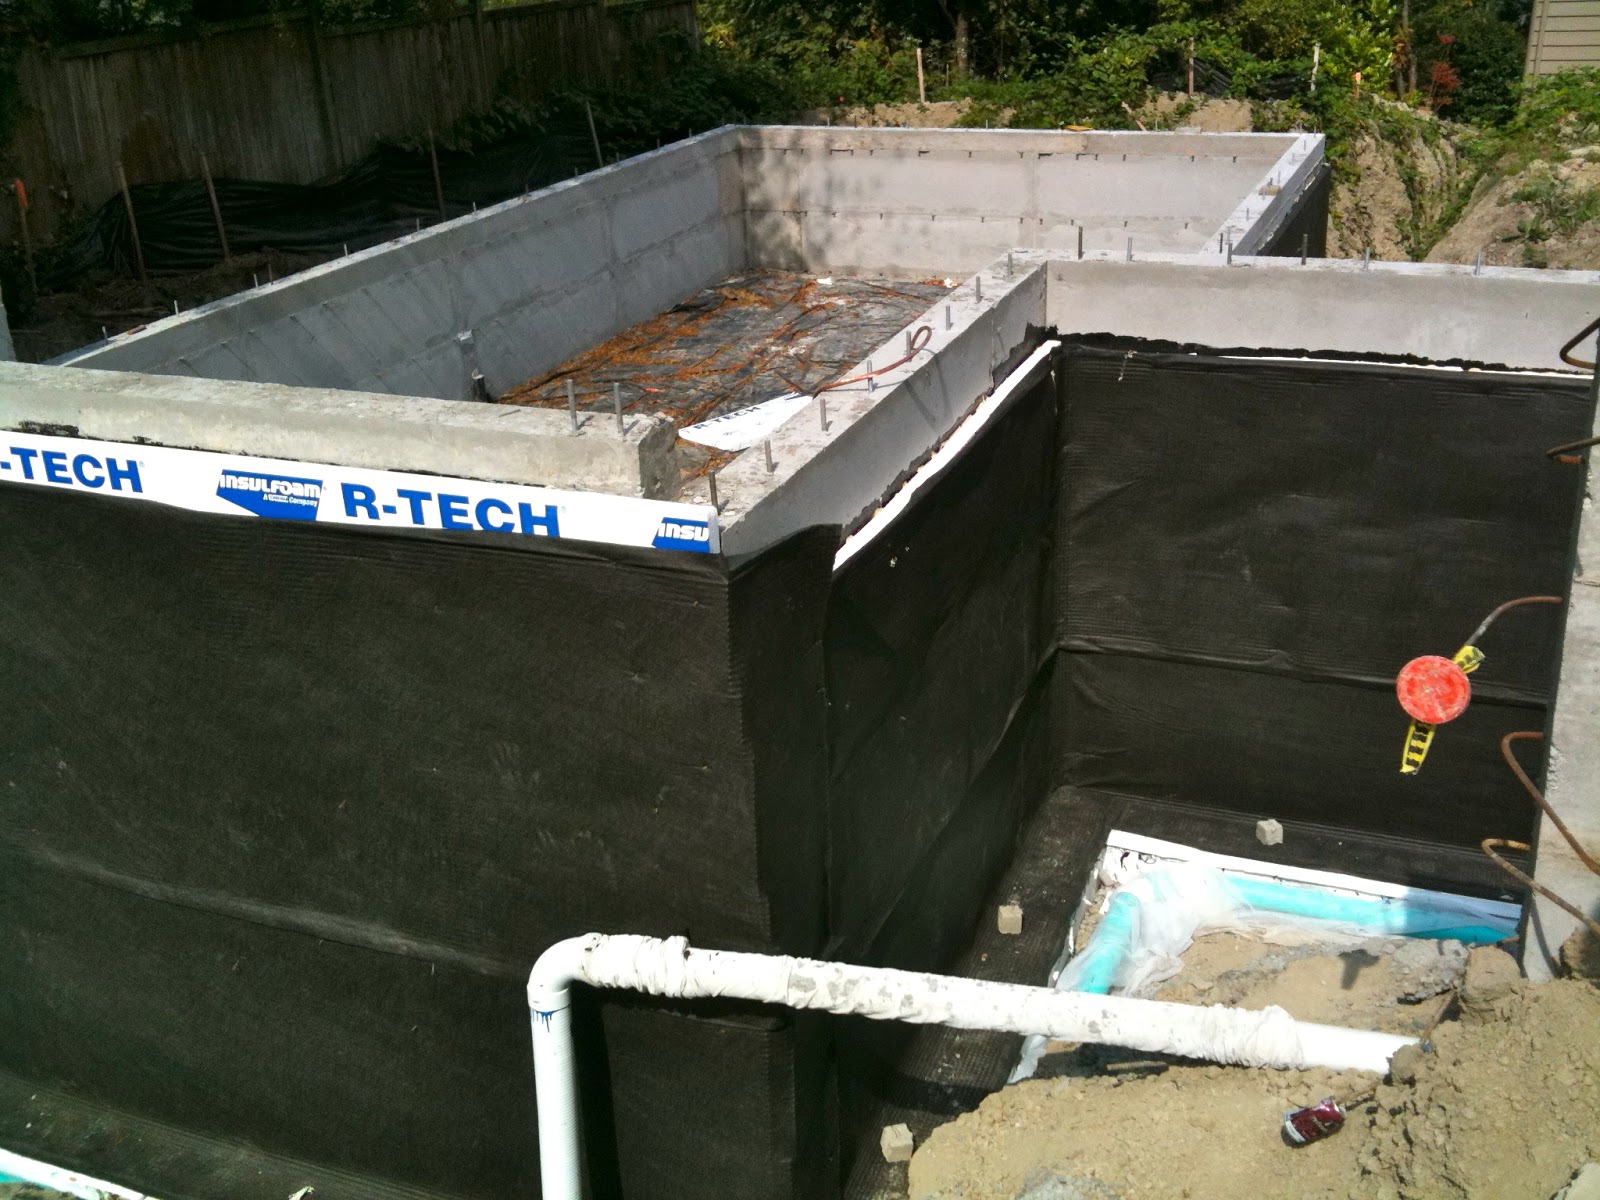
I'm back from my vacation. It's been over a month since my last update, and quite a bit of groundwork has been done. The exterior walls were covered with a tar-like substance for waterproofing. A 2" layer of foam insulation was then placed on top, followed by a drainage mat. Finally, drainage pipes were added around the perimeter of the foundation. The end result is that when water approaches the foundation, it falls through the drainage mat down into the piping without ever touching the foundation walls. The insulation is so that I can keep the interior walls as exposed concrete. Here's what it looks like altogether:


After that, it was time to backfill the lot. The large pile of dirt in the neighboring lot was distributed back over to my lot and mixed in with some gravel to provide better drainage. 

The neighboring lot

Backfilled lot
Suddenly I have lots more room on my lot! It's really starting to take form. The final steps in the groundwork are to run the utility pipes and pour the final two sections of foundation wall to connect the driveway retaining walls with the foundation. The first step is underway. The driveway is now all torn up for the utility pipes:


When the driveway gets put back together, we can pour the remaining sections of wall.

Tuesday, September 6, 2011

Foundation Walls

It's time for another picture post! After the slab cured, it was covered up with a vapor barrier and the contractor started working on the walls. The contractor happened to have an almost brand new set of forms, so I'll have nice, smooth interior walls. 

Makeshift entry into the basement
Those are 9' high walls! The garage will sit directly above this area.
Setting up forms for the walls and a rebar lattice


After the forms were all set up, the concrete truck came in on September 29 and poured all the walls. Here's what it looks like after the forms came off:

The mechanical room

The main footprint of the house

Drainage pipes around the perimeter of the foundation

View from the driveway
It looks like an unfinished development in the Gaza Strip right now, but most of that will be buried underground. The next steps are to waterproof and insulate the exterior walls, back-fill the lot, and pour the final walls connecting the retaining wall to the house.

Saturday, August 20, 2011

Foundation Slab

It was an exciting time at the site on Thursday! Starting at 8:30am, I got to see four large cement trucks navigate the narrow streets into my driveway to pour out the slab for the foundation.


The pour begins:


There's no turning back now! We can't even drill into the concrete after it has set because it would risk puncturing the embedded piping. Also of note in that picture is the 40ft coil of copper wire (lower right) leading to a Ufer ground setup in the foundation. That'll hook into the electrical box of the house. Here you can see the contractor directing concrete from the tube in the sky:


At the recommendation of the architect, we had "Seattle Sidewalk" pigment added to the mix to darken the slab. He said that concrete color matching is an inexact science, and he's had good results with that color in the past. It looks good in the photos!


Once the last concrete truck drove away, the troweling process began:


I was told they were out there until around 6pm. I can't wait to see what it looks like after it has cured! Next up are the retaining walls for the foundation.

Tuesday, August 16, 2011

Foam, Rebar, and PEX

After the gravel, the next step was to lay down a vapor barrier and cover the entire footprint of the foundation in a 2" thick layer of foam panels. 


Next step - take rebar...


...and tie it up in a grid.


Those red tubes you see there is PEX for the hydronic heating system. It's tied to the rebar.


All the pipes feed into the mechanical room of the house:


After this work gets approved by the city, it can be buried in 8" of concrete. This will hopefully happen later in the week!

Saturday, August 6, 2011

Grading and Gravel

With the side sewer line installed and buried, it's time to focus on the foundation of the house. There's quite a bit that goes into creating it. The first step was to flatten and compact the ground. Next, the plumber installed the sewer pipes that lead to all the drains in the house.


After that, they brought in and compacted a 12" layer of gravel across the entire surface. This is to add stability and proper drainage to the ground.


While I was on site, I saw them prepare for the next step:


They're unloading 2" rigid foam panels. Those will be laid across the entire surface of the gravel in order to insulate the foundation from the ground. This will prevent heat from escaping the house through the foundation and will make the bottom floor seem more like a normal room, unlike a typical cold basement.

That truck also has a bunch of rebar. This will be installed above the foam layer to help strengthen the 8" thick concrete slab.