Friday, January 20, 2012

Garage, Walls, and Snow

There was only a little bit of progress this week due to the snow. It did make for a very zen-like scene though.

View from the end of the driveway

Garage

I have a garage now. There is a nook in the garage which was originally intended to hold the water boiler and electrical panels. That part of the design was already approved by the city before we redesigned the foundation and moved the plumbing and electrical into the mechanical room on the bottom floor. I'm guessing this area will now be used for miscellaneous storage and shoes. 

Nook in the garage

Looking in at the foyer

Looking out from the foyer

Hallway from the foyer. Coat closet on the left.

Hallway leading into the guest bedroom on the left and office on the right.

View from the office

Ground-level patio in the foreground. The view from here will soon become much more imposing.

At this point, the structure is almost ready for the steel framing that will support the third floor. If the weather cooperates and the metal fabricators are on time, this should happen next week.

Friday, January 13, 2012

Framing: Second Floor

Significant progress has been made since a week ago. The second floor is up and I can walk on it!

A structure rises from the ground
One of the first things I noticed is that there is a big difference between the quality of framing in this house versus one from a standard spec house that I'm used to. The framing is composed of mostly engineered lumber, which has a few benefits over standard lumber. It's resistant to warping over time, is very level, is stronger, and has very predictable and consistent properties. Of course, all this is more expensive, but a house like this is designed to last at least a century.

Laminated Veneer Lumber (LVL).
I-joists to support the floors. My spec house used 2x12 lumber instead of these
Let's take a closer look at what's been done. On the first floor, we have the future media room.

Overview of the first floor
I'm standing in the bottom of the stairwell looking in. A half-bath has been framed on the left, a storage room on the right, and a hallway in the middle leads to the bonus area. The bonus area will remain unfinished, but I plan on turning it into a separate mother-in-law unit.

Inside the bonus area
The bonus area is directly below the 2-car garage, so that's why there is a beefy support beam in the ceiling. It will have one window so that it won't look like a cave.

Stairway to the media room
These stairs lead up to a landing area with a sliding door that opens up to the ground-level patio. Stepping through the opening for the sliding doors and moving back, the structure is revealed.

View of the house from the northeast corner of the lot
All of those openings will be filled with windows and sit underneath the cantilevered portion of the house. And finally, walking up onto the second floor you see this:

Supporting structure for the second floor
I'm standing on the garage floor looking at what will contain the main entry area, a coat closet, a hallway leading to the bedroom and office, and a stairwell.

Standing on the second floor
This photo is taken from the office area looking out toward the entry and garage. The empty area to the left is the stairwell leading down to the first floor.

The framers are doing a great job. These are experienced guys, but this is the most unique and challenging project that they've ever done. Once they move on to the third floor and the outer walls, the level of difficulty will increase. That's all for this week!

Thursday, January 5, 2012

Framing Begins!

Well, it's about time. All the materials are here, so framing has begun. I think this should be an exciting next few weeks! I'll let the pictures do the talking. 

Processed trees for the house


The neighboring lot

View from the driveway - soon to be obstructed by a cool house!

Framing

Monday, December 5, 2011

More Waiting

It's surprising how one delay in a project with many dependencies can throw off an entire schedule. We have materials supplier and a framer all picked out and they're scheduled to start on January 5th. Why a one month delay? There's a 4-week lead time for metal parts fabrication. The I-beams that are part of the core structure of the house won't be ready for delivery until near the end of the month, so it doesn't make sense to start framing until then.

It's a little disappointing to see nothing happening at the site for such a long period of time, but at the same time, it buys me more time to save money and research interior finishes.

Saturday, November 12, 2011

New Neighbor

The empty lot that's next to mine has been sold! Lucky for me, the buyer is also using Elemental Design as their architectural firm. Here's what the neighbor's house will look like:


It looks like it will compliment my structure quite well. I'm excited to see it get built!

And a mini-update: the structural plans are finally in, and we're in the process of getting a lumber and steel package together. Framing will start as soon as the numbers for the materials and labor come back. 

Monday, October 24, 2011

Foundation Completed

At this point, the foundation work is completed! Some dirt-moving still remains, but all of it is minor. The driveway is put back together:


Here you can see the final walls that were poured:


Now there is a solid wall on the front of the house. You can see the notched-out area for the garage entry:


This is a square of concrete that was poured for the support beam for the cantilevered portion of the house.


And finally, here you can see the sea of concrete that was poured to get the foundation to completion.


It looks much more impressive in person. That photo was taken from the northwest corner of the lot. The wall in the back is 9' high. You can also see the three driveway retaining walls on the upper left side and far right side of the picture. The floor pictured here is a bit dirty, but once the framing is up, it will be cleaned, sealed, and should look great. 

At this point, it's ready for framing! There is a bit of a delay in getting final framing plans to the sub-contractors, but I'm hoping work can start within a week or two.

Saturday, October 15, 2011

Backfill and Utilities

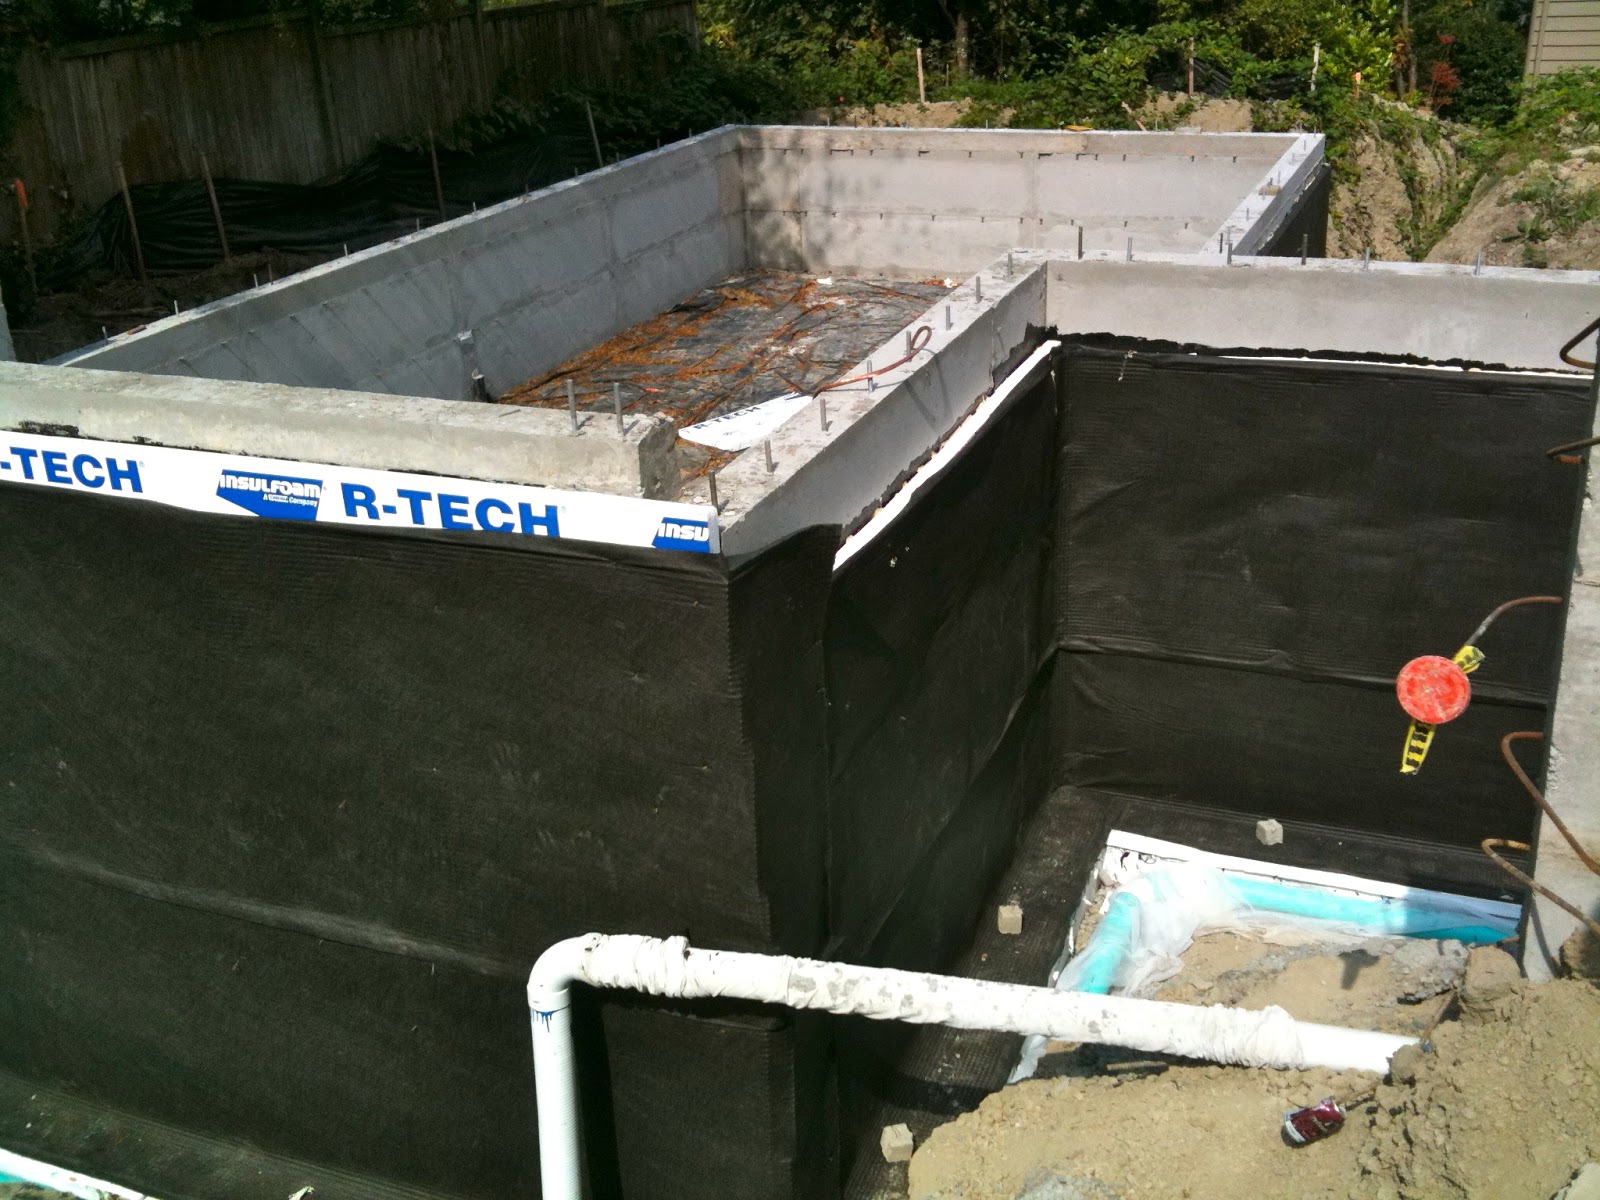
I'm back from my vacation. It's been over a month since my last update, and quite a bit of groundwork has been done. The exterior walls were covered with a tar-like substance for waterproofing. A 2" layer of foam insulation was then placed on top, followed by a drainage mat. Finally, drainage pipes were added around the perimeter of the foundation. The end result is that when water approaches the foundation, it falls through the drainage mat down into the piping without ever touching the foundation walls. The insulation is so that I can keep the interior walls as exposed concrete. Here's what it looks like altogether:


After that, it was time to backfill the lot. The large pile of dirt in the neighboring lot was distributed back over to my lot and mixed in with some gravel to provide better drainage. 

The neighboring lot

Backfilled lot
Suddenly I have lots more room on my lot! It's really starting to take form. The final steps in the groundwork are to run the utility pipes and pour the final two sections of foundation wall to connect the driveway retaining walls with the foundation. The first step is underway. The driveway is now all torn up for the utility pipes:


When the driveway gets put back together, we can pour the remaining sections of wall.