Saturday, May 24, 2014

One year utility breakdown

It's been about a year and some change since I've moved in. So far, it's been great. The memories of all the stress and turmoil are fading away. My mortgage isn't, but at least the stream of expenses is predictable and manageable.

One thing I've been curious about is how much utilities will cost for the house. With 12 months of data and 3 people in the house, the average cost of utilities breaks down to this:

  • Gas (heating, hot water, and stove) - $78/month
  • Electricity (lights, computers, servers, etc) - $58/month
  • Water, Sewer, and Trash (Seattle public utilities clumps these together) - $95/month
I was expecting worse, so I'm okay with the cost. I think that with a solar system upgrade, I can knock down the cost of electricity. I'm also considering adding some sort of rain catchment for watering plants outside to keep the water bill lower. 

Wednesday, March 27, 2013

Siding Part 3 - Corten Steel

House update: As of March 4th, I have my certificate of occupancy! I'm mostly moved in, but the blog is still not caught up. Not surprisingly, it's been a bit busy as of late... 

The second material to be installed on the exterior of the house was 14-gauge hardened weathering steel (or Corten). This is a type of steel that is designed to rust. With this particular steel alloy, the layer of corrosion on the surface protects the metal underneath, so the steel won't rust all the way through. As with the cedar siding, the intent is for this siding to be zero-maintenance. I should never need to do any painting other than the occasional rinse to keep it looking good.

Corten steel siding starting to rust on the house
The application of this siding was relatively simple, but the subcontrator had a very difficult time installing it. Each sheet of steel was very heavy and they broke many saw blades cutting it all to shape. The sheets are screwed into the wall with stainless steel screws and a generous application of caulking. The seams between the sheets are protected with a wide piece of weather stripping and caulking. We had some pretty heavy rains over the last couple months and there hasn't even been a hint of water infiltration, so I feel pretty good about this application.

Raw corten steel sheets

corten steel siding against charred cedar


soffit above the master bedroom sliders

steel siding on the deck

steel siding on the deck
I'm really happy with how it turned out. The steel makes the house look like it's been here for years already.

Saturday, February 16, 2013

Central Vacuum

One item I wanted to get for the house was a central vacuum. There is a surprising selection of brands and types of vacuums out there. From my research, there are basically two approaches one can take:
  • Standard power vacuum, many outlets (or inlets?), and a relatively short hose
  • High power vacuum, few outlets, and a long, retractable hose per outlet. 
I ended up going with pursuing the second option. It uses the locally-made Hide-a-hose system, which is really convenient. I like that it requires fewer outlets, so there's less attaching and and detaching of endings. I also think that fewer outlets mean that there is less clutter and less to break. The only disadvantage is that it is more expensive because the valves cost more, you need separate hoses, and the vacuum needs to be powerful enough to be able to suck the hose back into the wall once you're done with it. 

For a house of my size, I was quoted about $1800 for option 1 (main unit, garage kit, kitchen dustbin, and 6 outlets throughout the house), and $2500 for option 2 (main unit, garage kit, kitchen dustbin, and 3 hide-a-hose outlets with 40ft hoses). 

central vac in the kitchen with part of the hose coming out of the wall

vacuum in the garage

The main unit is a VacuFlo FC650. It's a filtered cyclonic vacuum cleaner, so there are no vacuum bags. All the dust and debris falls into a 6 gallon removable bin. When I briefly tested it out, I was pleased with how powerful and quiet the system was. With the main unit in the garage, most of the noise I heard was just the sound of air flowing into the hose. I'm looking forward to using it!

Monday, February 4, 2013

Drywall

For the drywall, I wanted a couple specific things - a level 5 finish and a 1/2" reveal for the base. Drywall installation and finishes come in several different levels of quality. Most houses have an "orange peel" texture applied to the walls. This is done to better hide imperfections in the seams between the drywall panels. In order to keep with the minimalist aesthetic, I wanted to have no texture applied to the walls. This requires more effort to be put into the installation since any imperfections would be immediately visible. 

First, all the studs had to start out perfectly lined up. Using a laser, the drywall contractors carefully stapled furring strips to the studs where necessary throughout the house. 

Furring strips stapled to the studs
They then screwed on the drywall and taped and mudded all the seams.

Taped and mudded seams
After that dried, they applied more coats of joint compound to the walls to further smooth all the transitions.

Additional layers of joint compound applied
And finally, they applied a skim coat across the entire wall and sanded it down to give the wall a perfectly smooth, textureless finish.

Bedroom with finished drywall
perfectly smooth walls

The resulting walls look great. The drywallers also spent a lot of time installing a 1/2" Z-channel base in the walls in lieu of any trim. This creates a shadow-line between the floor and the wall and looks really clean.

1/2" reveal base with level 5 finish

Special thanks to Artistic Drywall for doing such a good job and being on budget.

Wednesday, December 12, 2012

Front Door

Finding an entry door was much more of a challenge than I anticipated. The requirements in concept were simple - I wanted a door that looked as similar as possible to the neighboring windows in the foyer. I quickly found out that almost all residential front doors are made out of wood, not aluminum and glass. There is, however, a type of door that does fit the requirement - commercial storefront doors!

I started calling up various door vendors in the area including Vortex doors and Goldfinch Brothers, but had bad luck with all of them. The sales reps sometimes didn't respond, took forever to supply a quote, gave ridiculously high bids, or were disinterested in my queries. My guess is that since my search was rather unusual and one-off, the salespeople didn't see value in working with me.

After about 3 months of frustration, I finally found a vendor willing to work with me on a custom storefront door. Washington Door Service does about 80% residential and 20% commercial work. I ended up getting a Pacific Aluminum 300 series storefront door with the following features:
  • narrow stile
  • insulated glass
  • weather sealing
  • Adams Rite handle and locking mechanism
  • electrified door strike
  • hidden, continuous hinge
The door was manufactured and installed in 2 weeks time. It looks great, and I'll be able to enter and exit the house without needing a key!

Front door from the outside

Nice, modern Adams Rite handle

View from the inside

Monday, October 15, 2012

Insulation

In my research, I came across many different types of insulation that one can install in a new construction home:
  • fiberglass - by far the most common and cheapest
  • blown-in cellulose - this is where, with the use of a special machine, one fills all the cavities between the studs with a loose-fill cellulose fiber insulation. The benefit this provides over fiberglass is that it behaves more like a liquid during installation. It fills in all the gaps that might be left with fiberglass batting, has greater thermal mass, and is easy to manufacture
  • open-cell foam - this is a type of spray-on foam. It does not provide air or water-tightness, but is easier to apply as closed-cell foam. 
  • closed-cell foam - this is by far the best and most expensive type of insulation I came across. Similar to the open-cell insulation, a polymer liquid is sprayed onto the walls, and it expands as it cures. This type of foam provides very high R-values as well as creates an air and water-tight seal against whatever surface it covers

In order to get the most benefit out of the properties of the different materials and to save cost, I went with a hybrid approach. All ceilings were sprayed with a 1" layer of closed-cell foam, then the rest covered in fiberglass batting. That gives the benefits of the air-tightness of the foam and saves costs. The 2nd and 3rd floor walls were all given a blow-in cellulose treatment. 

Blow-in insulation on walls and closed-cell foam on ceilings

The rafters get filled in with fiberglass

Lastly, there was a bit of an error made in the planning of the downstairs area. Downstairs, much of the the concrete walls are exposed and insulated from the outside of the house. Unfortunately, the city inspector didn't like that there was a section of wall near the top that is not insulated from either side of the house. In order to keep the proper look of the house from the outside, I decided that the downstairs area walls should be framed out and insulated. I lost about 6" from the room, but I don't think it will be noticed. 

Monday, October 8, 2012

Siding Part 2 - Charred Cedar

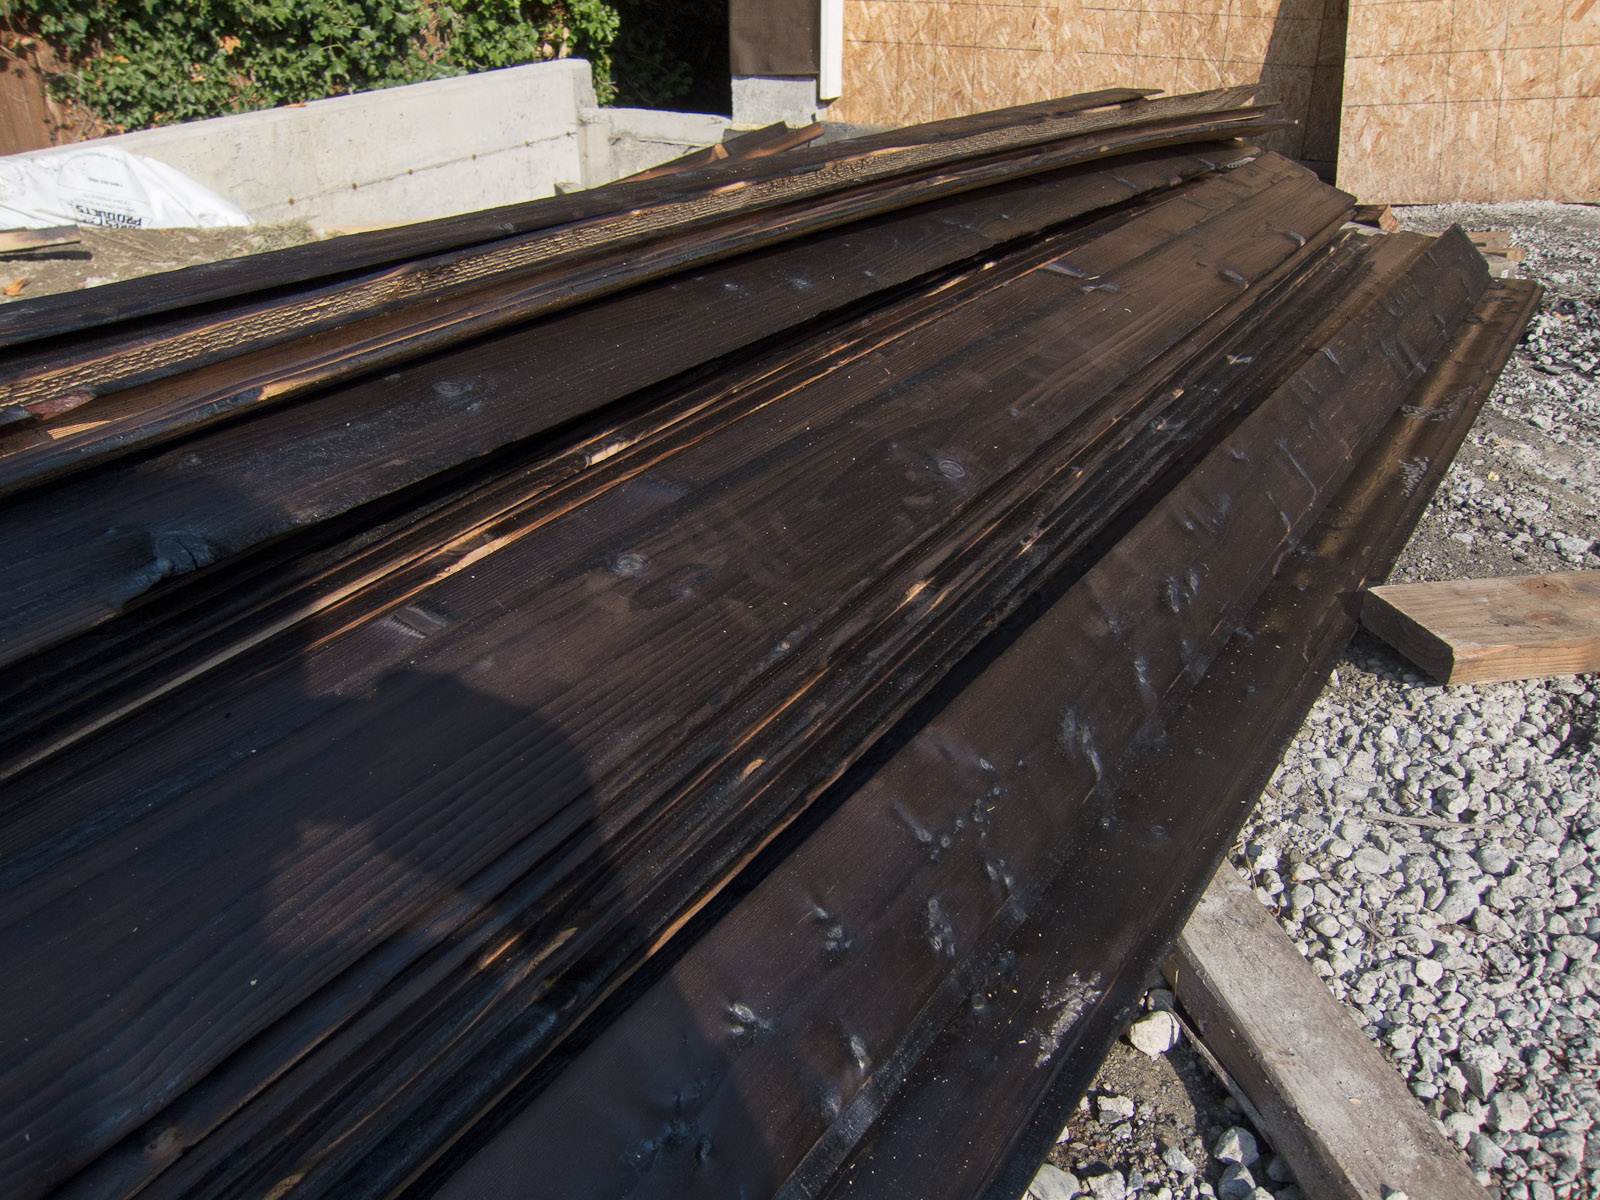
The siding contractors have finished installing the first of three siding materials on the house - charred cedar. This type of siding originates from an old Japanese technique called shou sugi ban. Traditionally, planks of wood are set on fire and allowed to burn for a few minutes before being extinguished. This creates a dark layer of carbon on the surface of the wood that serves as a natural layer of protection. The benefit of this technique over staining is that it is low-maintenance and will not fade over time. 

A truly authentic application of this technique would have leave the wood planks with deep veins, which I didn't want in a modern application. The contractors instead used a blow torch to burn the surface, rinsed and scrubbed the planks, and repeated the process three times to achieve an even tone in the wood without over-burning it. 

Blow-torching cedar siding. That looks like fun! (he had a big smile while he was doing this)

Rinse, scrub, and repeat
The result
 It looks really nice on the house, and hopefully will be very low maintenance. I think that over time, the dark brownish tint of the siding coming up from beneath the carbon layer will fade to a grey and will still compliment the other materials on the house.

Front of the house in full sunlight

Back of the house

Western side of the house


Sunday, September 30, 2012

Solar Heat Pipes

A green feature I wanted included in the build was the installation of solar heat pipes going from the roof to the mechanical room. Solar heat pipes are metal, insulated pipes that carry heat generated from solar thermal collector units on the roof down into a heat exchanger in the main hot water tank.

The collector unit is capable of generating heat even on cloudy days, so I'm hopeful this will give me good energy savings during the winter. 

I'm only installing the heat pipes for now to try and save cost.

The pipes start out on the roof...
They then make its way through the kitchen...
...go down a crowded wall in the foyer...
 
...and finally end up in the dark mechanical room


Saturday, September 8, 2012

Siding Part 1 - Moisture barrier

I've been neglecting the blog ever since I started a new job, and there are lots of updates I need to provide! Let's start with the outside. The materials for the siding have finally arrived, so the siding guys have started their work. The first step to siding a house is to wrap the exterior with some sort of a moisture barrier.


There are two major choices for a moisture barrier: Tyvek, or tar paper. I left this decision up to the siding subcontractor since both options seem about equally effective. The subcontractor chose tar paper since it's more time-tested and a bit cheaper than Tyvek.

Once insulation is complete in a few key spots, they can begin applying siding to the house. 

Tuesday, July 24, 2012

Multi-Phase Construction


Progress update: high voltage electrical is in, and low voltage is being installed this week. There's no rush with the electrical since the siding still hasn't arrived and that's on the critical path. Not much further progress can be made to the interior of the house until the siding is installed.

I've been mentioning that this project has been going over-budget. Unfortunately, I just don't have the cash to be able to finish the house out the way I want it. Normally, I think what people (especially spec home builders) do in this situation is look for ways to cut corners or eliminate components altogether. If I were flipping a house or planning to sell ASAP, I'd probably do the same thing. However, I'm planning on living here for quite a while, so I'm taking a different approach to my problem.

I am keeping standards high, but am going through the list of features in the house, and eliminating anything that can be easily added at a future date. If there is a non-essential major feature that needs prep work, I'll pay for the prep work so it's ready to be installed at any time.

The following things are being eliminated from phase 1:
  • Rooftop deck - I'll install mounting brackets for stairs and railings
  • green roof - this doesn't need any prep work other than framing that can support the weight
  • solar electric generation - A rigid metal conduit between the roof and garage is all that's needed for this
  • solar heat - a set of insulated pipes will be run from the roof to the mechanical room
  • Automated lighting - this was a tough choice since light switch consolidation can only be done now. Any future automated lighting system will involve replacing existing light switches with controllable ones. It won't be as clean and minimalist, but it's no worse than any other existing house that I've lived in. 
  • Security cameras - ethernet cable will be run to strategic locations
  • home theater - conduit, outlets, and speaker wire will be installed for a projector and sound system
  • generator - gas lines and transfer switch installed for now
  • outdoor grill - gas hookup and power is on the deck
  • overhead fans - the electrician has pre-wired for these
  • MIL unit - all the electrical and plumbing hookups are there, but it will remain unfinished.
With the preparations I have in place, I can complete any of those bullet items on my own time as budget allows with minimal disturbance to the existing structure. They are upgrades I will get to look forward to over the coming years.

By cutting the above from the budget, I don't have to cut corners on siding, doors, lighting, roofing, insulation, flooring, and other things that would be prohibitively expensive to modify after construction is complete.

Monday, June 4, 2012

Windows

A lot of time has been spent with the windows in the house. It's a big component, making up almost 1/3 of the surface area of the house.

The living room is where the windows are really featured. The windows are situated so they intentionally frame the view of capitol hill and the surrounding trees, while mostly blocking out the neighboring rooftops. This brings in tons of natural light, which is quite important around here, especially during the rainy season. 

The plans originally called for fewer, larger panes and had a giant Fleetwood 14'x9' triple sliding door out to the deck. This would have been an awesome feature of the house until I got some major sticker shock when I saw the ~$18K quote for the sliders. For a project that's already pushing the limit of what I can afford, that's way too much. We tried really hard to find a cheaper alternative without sacrificing the large opening, but none was found.

Original plan with large sliders

In light of the cost of the sliders, Pb redesigned the window/slider configuration in the living room to use a more standard Milgard 10'x7' set of double sliders. It's not as awe-inspiring as the large triple-sliders, and it shrinks the width of the opening to the deck from 9'4" to 5', but it ended up looking fine.

Current plan with double sliders

 Installed, it ends up looking like this:

Living room windows

The living room creates a great impression with the wall of windows. I feel like I'm in a tree house.

View of living room windows from the outside
One of the reasons this posting came a bit late is that the lower set of windows in the living room were ordered incorrectly by the rep at Home Depot and arrived in black anodized aluminum. It took a couple weeks for them to correct the mistake and have the replacement windows manufactured and shipped. 

The skylight had its own issues. Earlier, during the framing process, there was apparently a misunderstanding about the size of the skylight that was going to be installed above the kitchen. The result of that misunderstanding was that the opening for the skylight was 1-2 feet too wide in both dimensions. This would have been a non-issue (just get a bigger skylight) until I found out that nobody makes insulated glass skylights of that size without going to acrylic (with no insulation specs), or spending a lot more for some sort of a structural skylight. The house is already at the limit for meeting insulation code requirements due to the large amount of windows, so we had little choice but to frame in the opening to fit the originally-planned skylight. My contractor ate the cost for the extra framing, so least the mistake didn't cost me anything.

skylight above the kitchen with living room in the background
The frame for the skylight is bigger and taller than it needs to be as a result of the framing correction, but it's unimportant that it ended up that way.

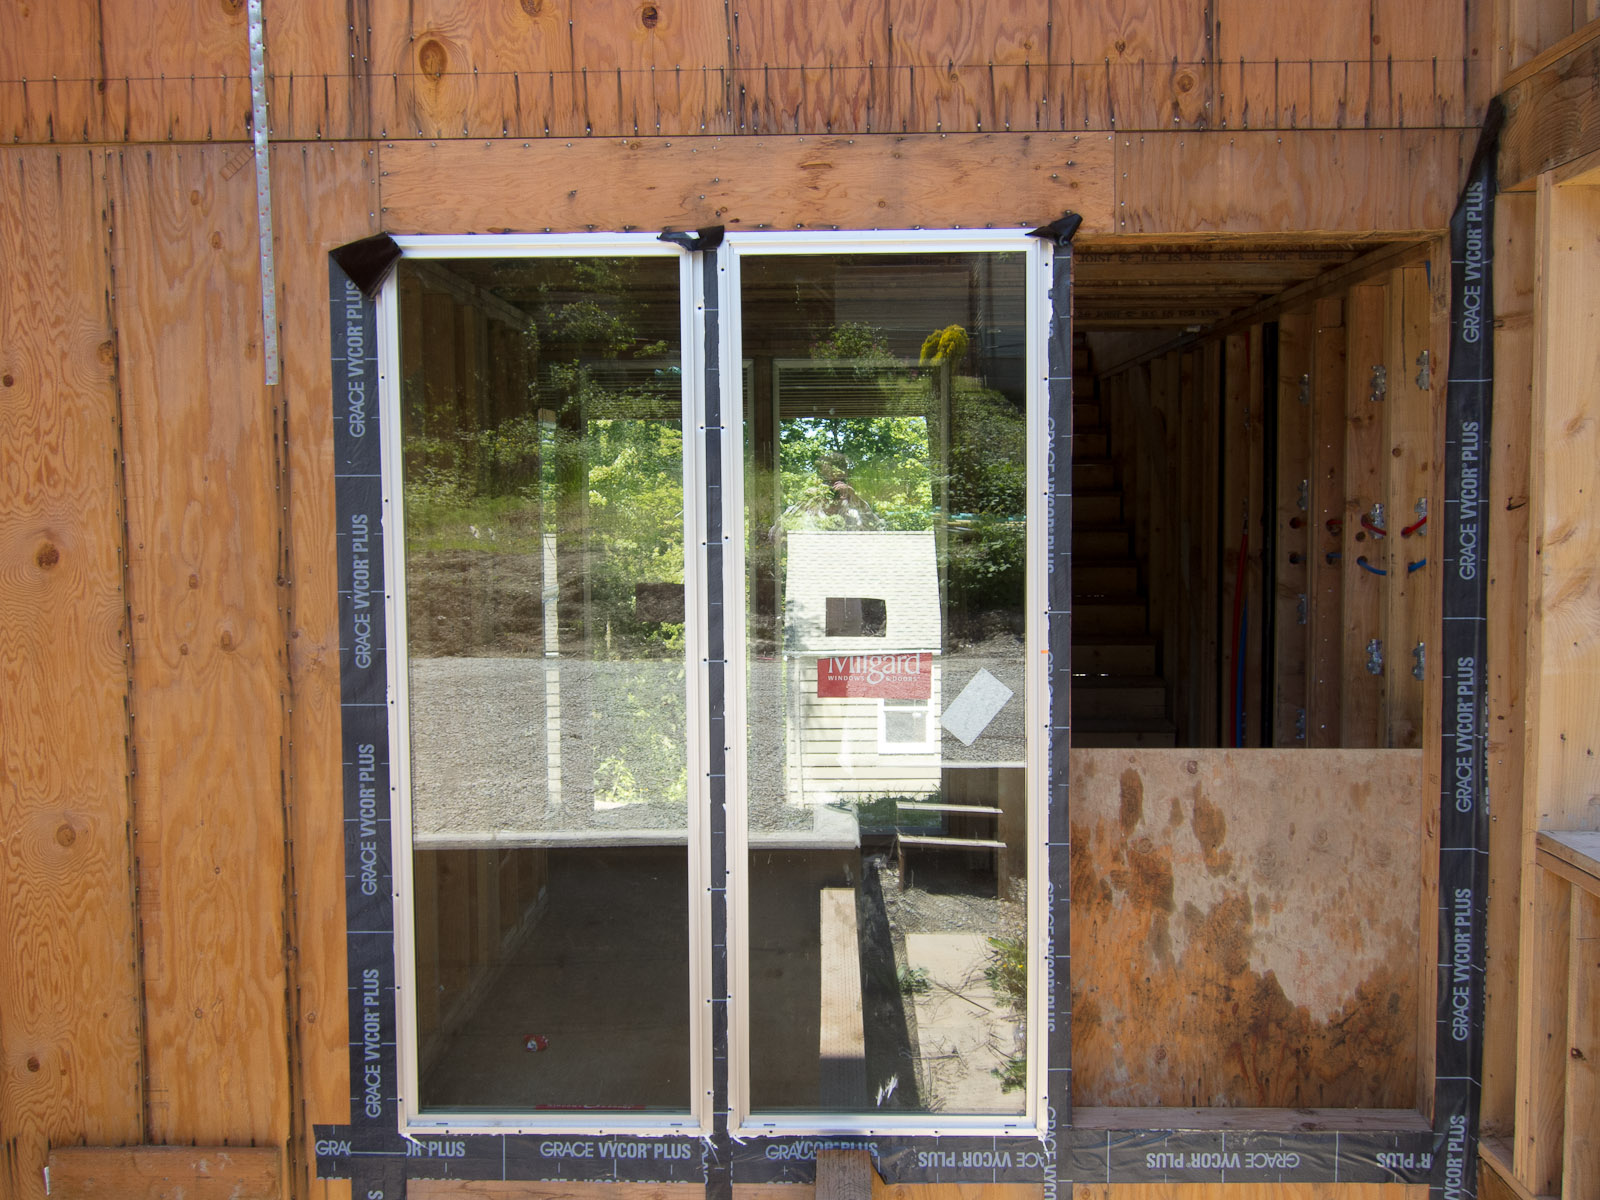
The entry has a doubled set of full-height windows that give that indoor/outdoor feel to the house even before you enter. I'm still on the hunt for a decently-priced front door, but the intention is to make it look like the windows next to it.

entry to the house
 And finally, behind the entry is another set of windows that bring in as much light as possible to the office area and stairwell. It also opens up the entire second floor and makes, what otherwise would be a narrow hallway, something more substantial.

view from the lower patio
Overall, I'm very pleased with the windows in the house, and they were one of the few line items that ended up being on-budget! 

Friday, May 25, 2012

Roofing

There are a few different types of roofing one can use for a flat-roofed house. I considered the following:
  • Torchdown - this is a classic method for waterproofing a flat roof. it involves applying heat to a bitumen-backed membrane (tar-like substance) and sealing it to the roof. This is relatively inexpensive and is expected to last 10-20 years depending on the thickness of the membrane. 
  • TPO (thermoplastic olefin) membrane - this is a relatively new kind of roofing membrane that's mid-priced. It is expected to last around 10-15 years. Since this is a newer, less proven material, some older TPO membranes have been known to break down faster than expected. I believe any new formulation doesn't have this problem. One nice thing about TPO is that it is white and allows for creating a cool roof
  • PVC (polyvinyl chloride) membrane - this is similar in design to TPO but has been in use for a much longer time. It comes in white, is a little easier to work with as far as sealing seams, and is expected to last 30-50 years. The downside is that it is the most expensive of the three options. 
Since I plan on living here for a while, I don't want to take any shortcuts with the roofing or siding of the house. I'd hate to get a leak, especially if it's underneath a layer of concrete. I chose to go with the PVC roofing. This roofing comes in several different thicknesses. I chose the thickest, 80 mil, since the price difference was only about 10% compared to 60 mil. It isn't very significant compared to installation costs and gives me some extra confidence that it will last. 

Here is what it looks like on the roll:

80 mil PVC roofing membrane
Installation is relatively straightforward. The roofers first lay down a thin sheet of foam insulation, mostly to prevent condensation from building up underneath the membrane during frosty nights. 

Roofers laying down foam insulation
 The PVC membrane is then rolled out on top of the foam, and is either heat welded or chemically bonded together. It looks like this when it is done:

Roof with PVC membrane
 The deck was finished in the same way.

View of deck from the master bedroom

Soon there will be 3" of concrete sitting on top of that. I really hope it never leaks. 


Saturday, April 21, 2012

Framing Completed

It's been a while since my last update. It's mostly because not much has visually changed since the last post.


As you can see, the changes from the exterior are rather subtle. So what's happened in the last month?

  • The framers completed work on the structure
  • The structure went through two rounds of inspections before it passed. There were a few minor corrections that the framers had to make, and the structural engineer needed to update the structural plans
  • A contractor for the roofing was secured
  • Work on interior plumbing has started
  • Windows have been ordered. This is probably worth an entire blog posting of its own. 
Factor in a few days waiting between some of those bullet points, and you get about a month. Having an independent general contractor vs a larger builder means that there is less project management and available resources, so things take longer to accomplish. The reward for the trade-off is usually a lower construction cost and slightly greater flexibility. 

Underneath the ground-level patio
Above, you can see the extra framing added to the stairwell to give strength to the stairs. I had the option to box-in the entire structure (like in the concept drawings), but decided against it since it reduces the amount of available space on the patio. It also doesn't do anything negative aesthetically, in my opinion. 

Inside, some of the changes are more visible. 

2nd floor bathroom plumbing

Aside from the plumbing, you can see that the framers meticulously built up the height of the floor in between all the studs in the house. This is in preparation for the concrete flooring that will be poured some time hopefully next month. 


The framers also added ties and hold-downs everywhere. This helps add earthquake resistance and further strengthens the entire structure. 

The plumber started on his work as well. Most of the drainpipes are in, and a lot of the PEX tubing for the hot and cold water has been strung just in the last few days. There's more tubing to come once he starts on the hydronic heating system. 

Media room

Washer/dryer closet
What's next? The plumbing needs to be finished. The windows are due to arrive in a week or two. The materials for the roofing arrives in about a week, so the roof can be installed. Once the roof is in place, the structure can start to dry out and electrical wiring can be installed.

Saturday, March 10, 2012

Rooftop framing

The final structure of the house is starting to take shape. It's looking pretty good! There have been countless small issues that have cropped up, and the framers and my GC are both frustrated, but I have a standing structure. 

The house

Standing on the roof
I finally got to walk around all the rooms of the house with roof overhead and get a sense of the proportions. I think everything is just about right. The deck is larger than I thought it would be, and the bedroom is a little smaller, but it's nothing unreasonable. The skylight in the kitchen is awesome, and it's about 4x larger than I pictured in my mind. I don't think I'll ever have to turn the lights on during the daytime.

View from the bedroom

View from the living room

View from the dining area
I think the framers finish their work this week. As expected, the roofing and siding bids came in way over-budget, and I'm still deciding what to do about that problem. The stress level hasn't gone down yet, and I'm bracing for more surprises until I get my certificate of occupancy.